!*!*ADD YOUR INPUT*!*! _.- Home Made With Love -._
Moderator: Mods
-
- Posts: 98
- Joined: Mon Aug 23, 2010 8:25 am
- Location: Columbus, GA
- Contact:
!*!*ADD YOUR INPUT*!*! _.- Home Made With Love -._
Ok, so I wanted a thread where everyone could come and share toys, play-stands and anything else they have made for their feathered sweetie pies! So, here's a place to share and get ideas on anything non-store bought.
Please give as many details as you can including a picture if possible, a short description, materials used, instructions on how it was made and if possible where they were bought from and approximate costs so that others can do it too!
Maybe the Mods will even put something like this in the Board Index if it gets big enough, so there can be topics for play-stands, ladders certain toys or different things to do with different materials
This will be fun!!!
-
- Posts: 98
- Joined: Mon Aug 23, 2010 8:25 am
- Location: Columbus, GA
- Contact:
Re: !*!*ADD YOUR INPUT*!*! _.- Home Made With Love -._
Ok so I'm not sure whether it would be best to make a new post for each toy or one for all of them as new posts would keep this thread at the top, but on the other hand it might bog things down and make it hard for people to respond with questions and comments on each thing... So for the Play-stand I'll do one separate since it will be longer and the toys I'll do all in one since those are simpler projects.
Spiral Play-stand
The play-stand I chose to make has:
A spiral stair-case made with 1/2", 5/8", and 3/4" dowels cut into 8" lengths [Under $2 each for 36" dowels x 6 rods]
With a stainless steel chain link railing [$10 for 10' of chain. I bought two packages]
Threaded through nickle plated eyelet screws (zinc can be toxic) [Price varies on how many you get and what size]
Set into a 1.5" wide by 5' tall PVC pipe [Under $3, can't remember exact price but it was cheap]
Three top perches in the same widths but 18" long [Again, dowels were cut to size from 36" dowel rods under $2 each]
18"x18" base made with 3/4" thick scrap plywood [Free, from another project of ours]
With an 18"x18" self adhesive linoleum tile placed on top [Around $2 for a single tile]
The PVC pipe is set into a drain type fitting (found in plumbing with the PVC) that had bolt holes [I think around $8]
And of course bolts. [Less than $1 for 4]
All of these materials came from Lowe's or Sears
As far as tools go I used an electric drill with multipurpose drill bits to drill pilot holes (only big enough that the screw portion of the wood bits don't bite into the plastic which makes the drilling suck in plastic), then wood bits with spurs to make the 1/2", 5/8" and 3/4" holes for the dowels. I got a kit with those three sizes and three more for $20 at Sears.
First I marked lines all around the pipe 1" apart from each other vertically (creating a ladder look) up to the 4' mark. Then marking an X on the first lateral line (to where each hole, then dowel would go) I measured 1" to the right on the next lateral line creating a spiral pattern as I moved up. At the top of the PVC pipe I marked an X on opposite sides of the pipe 1" from the top, then 90 degrees doing the same (marking an X on opposite sides of the pipe) 2" from the top, which will form a cross I can hang toys from when it's finished.
I then drilled pilot holes at each X (all the way through both sides of the PVC) large enough that the screw-part of the wood bits would not bite into the plastic, only the spurs and actual drill. When drilling the pilot and finishing holes try to keep the drill bit as square as possible or you will have crooked dowels ). After that I drilled holes with those wood bits, guided by the pilot holes in a successive pattern of 1/2", 5/8" and 3/4" up the spiral pattern I had marked out. I originally bought O-rings to keep the dowels in place but found out I didn't need them as the dowels fit very snugly in each hole. I cut the dowels into 8" sections, ending up with eight 8" dowels of each width (24 8" dowels in all) and three 18" dowels, one of each width. I then cut a 4" and 6" piece of the 1/2" dowel to use at the top to hang toys.
I drilled pilot holes in the end of each dowel a smidgen smaller than the eyelet screws I was going to use, then I put the dowels into each hole. I had to screw some dowels into the holes to get them in but this resulted in a depressed spiral pattern in the wood which looked and felt cool so I did it intentionally to the rest of them with good results. Then I screwed each eyelet into the hole, making sure the eyelet was parallel with the dowel then adjusting the perch so the eyelet screw was facing vertically to support the chain railing.
Cutting the scrap wood down to 18" x 18" square I put the linoleum on and pressed down to get all the bubbles out and help the adhesive along then let it set for a few minutes. I then measured the middle of the platform and the proper widths for each hole in the plastic base that held the PVC pipe in place. I drilled holes to match the bolts all the way through, then on the underside I drilled enough to sink the nuts into the platform for stability, but not all the way through or that would defeat the entire purpose of stability! Bolting the base down I used pliers to hold the nut in place as I screwed the bolt in with a wrench. I placed the PVC into the base, then pried apart the last link in the steel chain and attached it to the bottom eyelet in the spiral. Then I threaded the chain through each eyelet and spread the appropriate link apart at the end of the staircase (before the 18" perches) to detach the excess chain and attach it to the top eyelet, keeping the chain taut and untwisted.
Add toys as you want and enjoy!
-
- Posts: 44
- Joined: Thu Nov 19, 2009 2:49 pm
- Location: Somerset, UK
- Contact:
Re: !*!*ADD YOUR INPUT*!*! _.- Home Made With Love -._
That is very impressive! I'm going to have to attempt something similar!, thanks for the inspiration!
-
- Posts: 2708
- Joined: Mon Jul 19, 2010 1:17 am
- Location: Sunshine Coast, Queensland, Australia
Re: !*!*ADD YOUR INPUT*!*! _.- Home Made With Love -._
I'd like to contribute a website:
http://www.parrotenrichment.com/
On it, are two free eBooks that give you ideas on enrichment for your parrot and give you instructions on how to make things. Within the site, there is even more information. There are videos on how to make things and instruction booklets as well as video footage of the birds interacting with the toys.
I find it really inspiring.
Regards
Ellie.
P.S. I know I suggested we have a thread for this... but I think you are right PythonzEve, I think it could use its own section on the forum. I recently came across a similar thread that we had forgotten about.
-
- Posts: 129
- Joined: Tue Sep 02, 2008 1:46 am
- Location: Victoria....Australia
Re: !*!*ADD YOUR INPUT*!*! _.- Home Made With Love -._
PythonzEve,
WOW....that is amazing!!!
-
- Posts: 2601
- Joined: Thu Oct 11, 2007 11:35 pm
- Location: Central West NSW Australia
- Contact:
Re: !*!*ADD YOUR INPUT*!*! _.- Home Made With Love -._
This is great!!!
A lot of effort went into that Pythonzeve, well done.
-
- Posts: 98
- Joined: Mon Aug 23, 2010 8:25 am
- Location: Columbus, GA
- Contact:
Re: !*!*ADD YOUR INPUT*!*! _.- Home Made With Love -._
Thanks everyone and good link Ellie! I know there are even websites out there dedicated to home-made toys or cheap toys, but all of it is just so spread out! Links would definitely help expand this thread further for people
Ok so here are some of the toys I've made, not all of them but it was getting late last night so I took pictures of the ones that were up. Hmmm I guess let's go from the simplest to more "complex" if you even want to call it that, most of these were pretty easy and very cheap. Sorry about the photo sizes guys, not quite versed enough on how to re-size photos on photobucket. Well, I re-size them on photobucket and they show up huge here so...
This one is gift ribbons that I took the staple and tape off of and tied to a clasp. He loves to try to 'preen' the ribbons and play with the curls.
Ribbon cost $1 for a package of 5 at the dollar store
Clasp cost less than $1 for a package of them at Hobby Lobby
This is a Snuggle Buddy I made from a feathered boa by tying knots in it until it was a good size and 'plumpness' and adding a clasp to one end. I chose white because his sibling (Ink) was white at the breeder and I wanted something comforting when he came home. He still snuggles up so close to this he uses it more like a blanket sometimes.
Boa cost $1 at the dollar store
Clasp cost less than $1 for a package
Here is a button-bell abacus I made by tying a clasp onto some yarn, tying a triple knot about an inch out from the clasp, and threading colored over-sized buttons and a bell before repeating the knots and clasp at the opposite end. Sometimes he pins his eyes and really goes after the red and purple ones
Rainbow Yarn $1.50 at Walmart
Colored buttons were $2, I got 2 packages and you should be able to find them at any craft shop
Bell was around $2 for a package of like 6 if I remember right at Hobby Lobby
Clasp cost less than $1 for a package
Here are two. One is a yarn snuggle buddy I made by cutting 3 pieces of about 18" of yarn, tying them to a clasp then braiding in knotted pieces ranging from 1" to 3" long (tie one on, braid, tie, braid, etc). Remember once you tie it it becomes two pieces half the size of the original piece. At the end I braided a bit more and tied a bell on. He loves preening the yarn.
Rainbow Yarn $1.50 at Walmart
Bell was around $2 for a package of like 6
Clasp cost less than $1 for a package
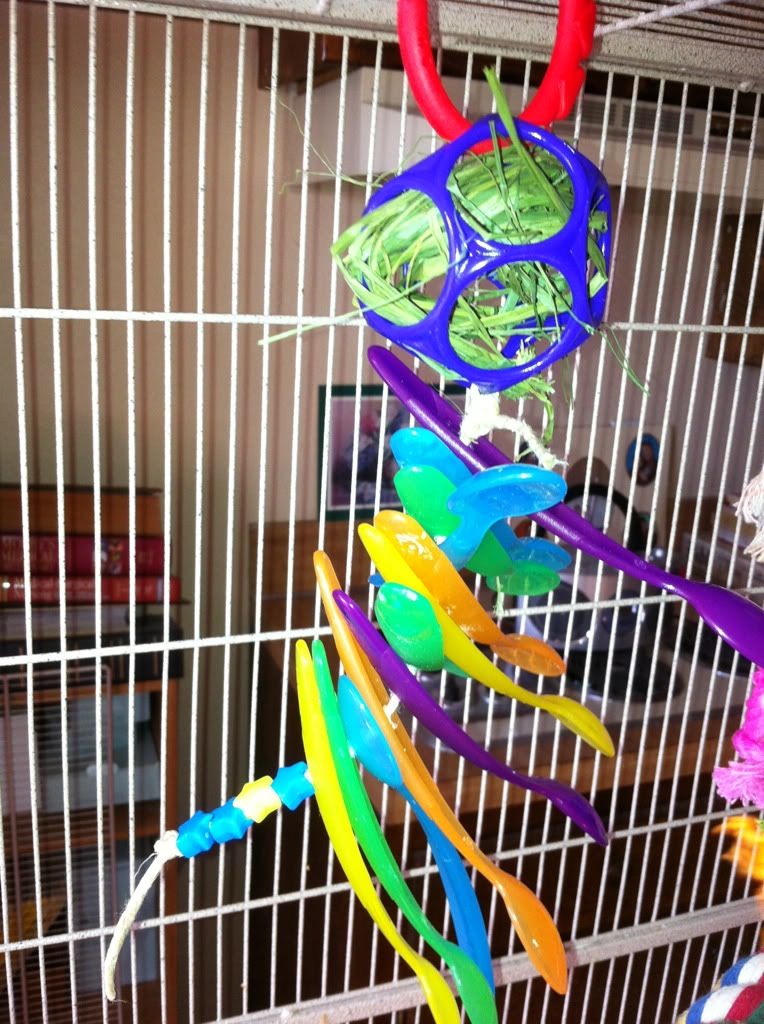
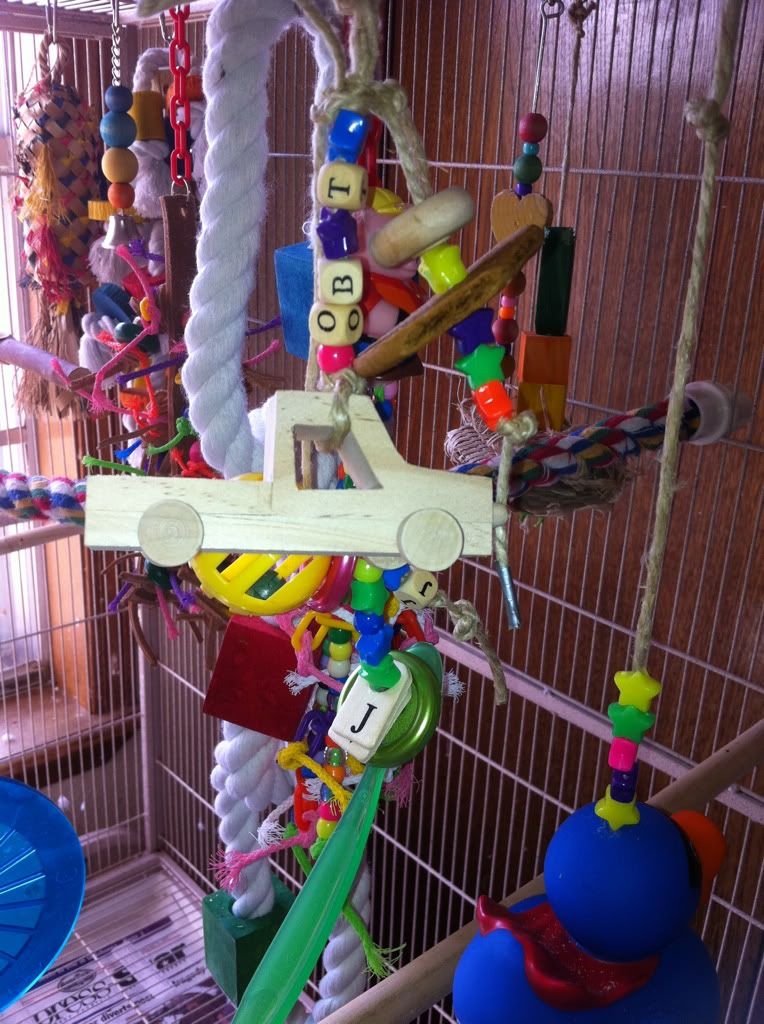
The other is kind of a miscellaneous jumble of toy parts for foraging and fun. Tied a pacifier on the end of a strip of vegetable-tanned leather and threaded Indian beads, unflavored rawhide, cut up straws, wooden beads, apple wood, bottle caps (from milk jug, juice, sports drink, etc.) rattles, lei flowers, plastic colored shot glass, letter block, and a carabiner to clip it.
Package of pacifiers $1 at the dollar store (baby shower section)
Leather strip 75cents for 3' at a bird show
Indian beads $1 for a bag of 300 at dollar store
Unflavored rawhide $1.70 at any grocery store
Straws were free. Washed and cut before being recycled as toys
Wooden beads were about $1.50 for a package at hobby lobby
Apple wood chews were about $1.30 at Target in the rodent section, predrilled
Bottle caps were free. Washed and drilled before being recycled as toys. These make great (small) foraging nooks! Add some movable sticks or something to block the birds path to increase challenge. I added the rattles so he'd have to move them around to get at seeds.
Package of rattles $1 at dollar store (baby shower section)
Lei flowers were $1 for a package of 3 leis at dollar store. The spacers were straw type things that I also use and I even saved the string after I cut them up.
Plastic colored shot glass came in a package of like, 12 for $1 at the dollar store or Walmart (careful drilling holes, they crack easily. Keep the speed slow and put your fingers behind the other side of the plastic instead of something hard or the cup will crack. If you're going slow no worries about hurting yourself as long as you're smart). These are awesome foraging toys and I use these as feeders on my play-stand with his pellets.
Letter blocks were $3 for a package of 18 pre-drilled blocks at a bird show
Carabiners were $1 for a package of 3 at a craft shop
And last for the toys that I have up is a Swing that I made from a jump rope and Cholla wood. I took the handles off, threaded the Cholla wood on, tyed a triple knot and shoved the knots into the Cholla wood so it would stay, tied a couple single knots one on each side to keep any toys up (there were toys there, but Sukha gnawed them off), knotted again to keep the handles in place, used the handles as spacers and fixed a loop system to hang it at different heights and angles in the cage. I tied a string of yarn in place over head with bottle caps, Indian beads, wood beads, flowers and a bell. I put in a couple cut pieces of cardboard tubing that was used in gift wrapping so had no glue on it (check wrapping and packaging shops, they throw them away every day)
Jumprope $1 at dollar store
Cholla wood about $1.60 at Hobby Lobby (unbleached, I painted it with food coloring)
Rainbow Yarn $1.50 at Walmart
Bottle caps were free
Indian beads $1 for a bag of 300 at dollar store
Wooden beads were about $1.50 for a package at hobby lobby
Bell was around $2 for a package of like 6
Lei flowers were $1 for a package of 3 leis
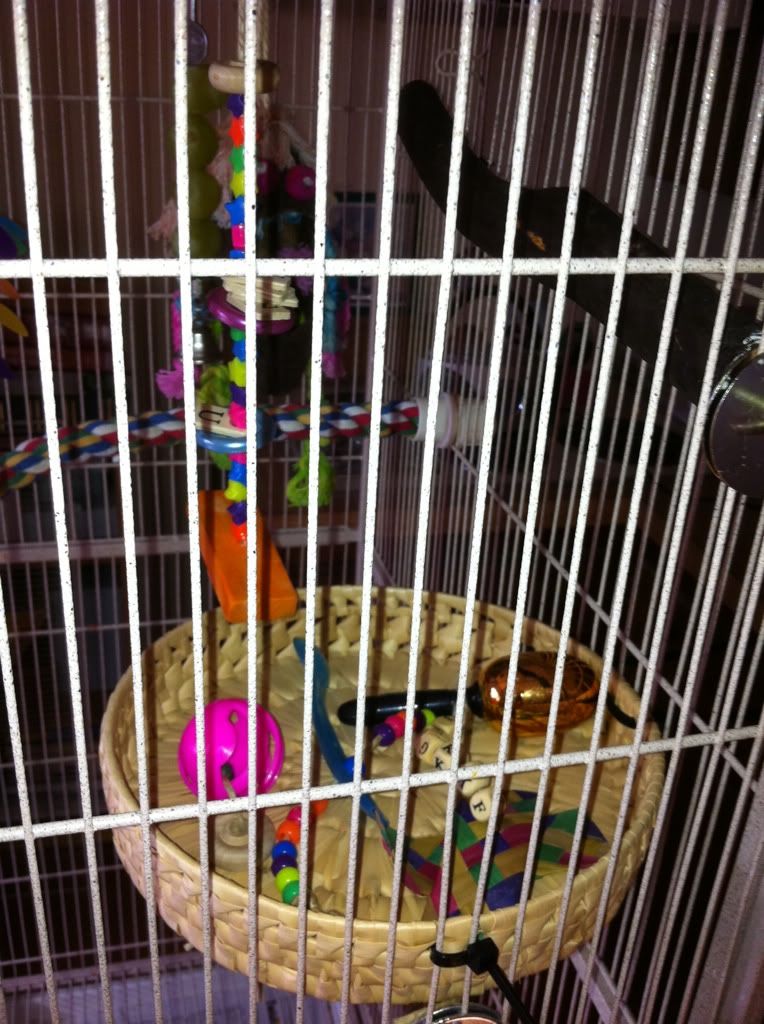
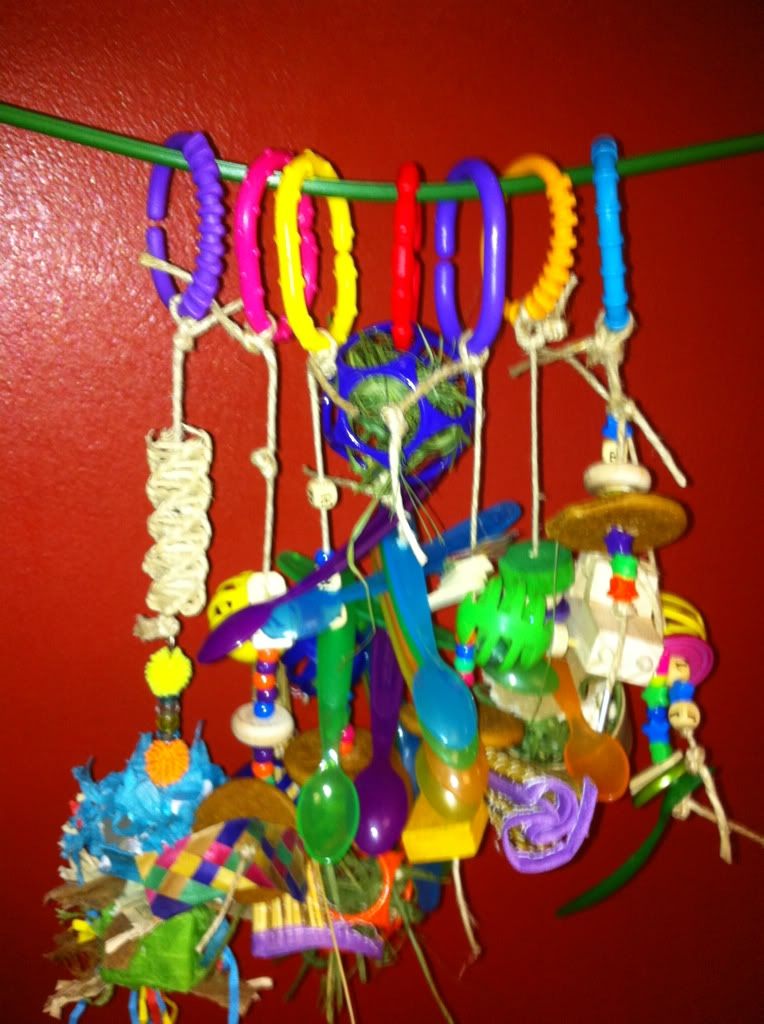
I've also made a swing from a wicker wreath (You guessed it, $1 at dollar store) and wrapped the bottom with hemp rope I had, painted the hemp with food coloring and stuck a carabiner on it, -a simple bell with small chain link and a bell, -a chewie toy with all apple wood and rawhide pieces on some leather, and -a baby toy with plastic disposable baby spoons (holes drilled in bowl of spoon), rattles, pacifiers, "block" beads, Indian beads, a rattle/maraca, ribbon and wooden blocks on a bamboo skewer and a couple others I can't think of right now, I'll have to look in his toy box. I may add pictures of these later if anyone really wants to see them.
Last edited by PythonzEve on Mon Nov 22, 2010 3:14 pm, edited 2 times in total.
-
- Posts: 2708
- Joined: Mon Jul 19, 2010 1:17 am
- Location: Sunshine Coast, Queensland, Australia
Re: !*!*ADD YOUR INPUT*!*! _.- Home Made With Love -._
Wow Jessica. I'm thinking I should print your last message and take it with me when I go shopping. I'm always scared to use things from craft stores & $2 stores in case they are toxic. I tend to buy the toy parts from bird stores... but they are more expensive, quite often for the same thing. How do you decide?
Also, I was wondering if you could post higher res pics of the first photo and the second last one... they're a bit hard to see.
Thanks for sharing. This is a fantastic post!
Ellie.
Also, I was wondering if you could post higher res pics of the first photo and the second last one... they're a bit hard to see.
Thanks for sharing. This is a fantastic post!
Ellie.
-
- Posts: 98
- Joined: Mon Aug 23, 2010 8:25 am
- Location: Columbus, GA
- Contact:
Re: !*!*ADD YOUR INPUT*!*! _.- Home Made With Love -._
Hi Ellie, sorry I thought all the big pictures would annoy people so I was messing around trying to make them smaller
Also I have researched a lot because I feel I can never learn enough and absolutely LOVE learning new things! Even useless history facts are interesting to me, like did you know there are 'ghost' states that were a part of America but are now forgotten? Like Absaroka, Franklin, Jefferson, Amikejo, Stellaland, Imperial Texas, even one called Subcarpathian Ruthenia!
Anyway all of this research includes bird toxicities like lead which is well known, zinc (which a surprising amount of bird toys are made from or coated with to prevent rust!), stains and flavorings to make toys more appealing, even some woods like cedar, red cherry and oak, along with others you can usually look up or get a toxicity handbook. Also I look at other home-made toys and get ideas, but a lot of it has to do with imagination and creativity, like making a bird chime out of nickel or stainless steel steel measuring spoons and perhaps some veggie-leather with pony beads for color or stringing colored plastic (not painted, but where the actual plastic is colored is less hazardous) beaded garlands or stainless steel through whiffle-ball holes and attaching toys, coffee filters (which you can color with veggie dies) and shredded paper (no staples, tape/glue or plastic such as from envelopes) in shredders toys and so such I like walking through the dollar store up and down the isles and thinking "Could I use this?" or going into the different pet isles like small animal for chew toys, cats for bell, ball and feather toys, cool wood pieces (like grapevine) in the reptile section, dogs for chew and foraging toys (like a woven bouncy ball that I can stuff treats into) and so on.
Keep an open mind and open eyes when you shop and you can come up with some pretty cool stuff as long as you remember the general safe things, like the cotton rope that is used in the jump rope which is safe, unbleached wood and whatnots, hard plastics your bird can't ingest, stuff like that. Of course always keeping a close eye on any toy your bird starts to shred is smart, like I look in Sukha's tray as I clean it out and make sure the over-sized sequins are all in one piece (he loves to rip them off of toys after tonguing them a bit) or that I can find most of shredded items like the Popsicle sticks. This way I can also wash and recycle things like pony beads that he tears off as well. And as a bonus (for me) once I'm done going through the non-biodegradables I can toss the brown recycled paper and all the leftover food and guano in my compost bin
Here is the pictures you asked for in larger sizes, but as they were taken with my phone the quality is not top notch or anything.
Gift ribbons
And the yarn snuggle buddy and miscellaneous foraging toy
-
- Posts: 2708
- Joined: Mon Jul 19, 2010 1:17 am
- Location: Sunshine Coast, Queensland, Australia
Re: !*!*ADD YOUR INPUT*!*! _.- Home Made With Love -._
Thanks Jessica. That's fantastic.... and thanks for the toxicity info too!
Do you use a drill or anything? I had an idea of what I wanted to create but it required me to drill holes in paddle pop sticks.... I tried making the holes with scissors but I kept breaking the sticks. Are there any particular tools that you use?
Ellie.
Do you use a drill or anything? I had an idea of what I wanted to create but it required me to drill holes in paddle pop sticks.... I tried making the holes with scissors but I kept breaking the sticks. Are there any particular tools that you use?
Ellie.
-
- Posts: 98
- Joined: Mon Aug 23, 2010 8:25 am
- Location: Columbus, GA
- Contact:
Re: !*!*ADD YOUR INPUT*!*! _.- Home Made With Love -._
A drill is DEFINITELY on the top of my list for making toys! I keep a cordless rechargeable Dewalt on hand with a kit of good quality all purpose bits. I drill through wood and plastic mostly, some nuts to string them up in toys and food like cereal and crackers and fruits... But yeah, some type of yarn or rope, drill and scissors, clips and beads are the most used in my toys. Just make sure when making shreddable toys that whatever you string or build them on will last longer than the shredders, or you'll just end up with a mess on the bottom of the cage (as I've learned the hard way). Speaking of, I need to make a few more of those...
OH! Something I've found interestingly useful as quick shredders that are free and a great way to 'recycle' fresh food scraps... Sukha LOVES to obliterate dried peels, especially of fruit! I eat a banana, orange, tangerine, apple and whatnot and of course offer him some fruit. After I'm done I dry out the peel and viola! Instant shredder. Loop the banana peel through some bars, get creative with an orange rind, pierce and hang a melon rind and whatnot. As far as orange peels I (and he) likes them a lot, I like to peel it in a spiral so it's all one piece and I thread it on almost anything and Sukha goes to town destroying them!
I would take a picture but regrettably they don't last very long. Whatever is left I compost
Re: !*!*ADD YOUR INPUT*!*! _.- Home Made With Love -._
/GASPPythonzEve wrote: This is a Snuggle Buddy I made from a feathered boa by tying knots in it until it was a good size and 'plumpness' and adding a clasp to one end. I chose white because his sibling (Ink) was white at the breeder and I wanted something comforting when he came home. He still snuggles up so close to this he uses it more like a blanket sometimes.
Boa cost $1 at the dollar store
Clasp cost less than $1 for a package
Ink's long lost twin! :D I love it.
I tried to get something similar for Ink, it was like a small pair of "fairy wings" but made with feathers. It was white also, but she didn't take to it. >:
I <3 this thread. :D
A bird does not sing because it has an answer. It sings because it has a song.
-
- Posts: 98
- Joined: Mon Aug 23, 2010 8:25 am
- Location: Columbus, GA
- Contact:
Re: !*!*ADD YOUR INPUT*!*! _.- Home Made With Love -._
Thanks! I'm surprised no one else has added to it. I've made a few more, but I need to take pictures.
-
- Posts: 98
- Joined: Mon Aug 23, 2010 8:25 am
- Location: Columbus, GA
- Contact:
Re: !*!*ADD YOUR INPUT*!*! _.- Home Made With Love -._
Here are a few more, still need to get pictures of others Are there really no other people that make their own toys and/or want to share them with other people or show them off?
Here is a hanging play stand I hung in front of our window. It now has a rope attached to it stretching to the cage so Sukha can (and LOVES to) go up and down on his own.
Pants Hanger cost about $6 at Target
Hemp rope was free for me, probably a few bucks at a craft shop otherwise
Scrap blanket material was used to thicken it up a bit, cost depends on how much you get at any craft store
I wrapped the hemp and material how I wanted it then hung it up... That's pretty much it
Whiffle ball and Chain was made by hanging stainless steel chain through the holes in the whiffle ball and adding little toys to individual links by prying them open with pliers, adding the toys then closing them back up with pliers.
Whiffle ball came in a package of 4 for $1 at the dollar store
Chain was in a package of 10 feet for about $10 at home improvement store
Toys were mostly found for $1 a package at the dollar store
Clasp was in a package of 3 for $1 at a craft store
Coffee filter shred toy I made simply by poking holes in coffee filters and stringing them along with some cereal and pony beads on some yarn with a little rattle tied at the end to keep everything from falling off.
Coffee filters are cheap at any grocery store, depending on how many, brand and size
Cereal was taken from our cereal boxes, can be found at any grocery store
Yarn was bought for about $1.50 for a roll at Walmart
Rattle was $1 for a package of 6 or so at dollar store
Clasp was less than $1 for a package at the craft store
Pony beads were $1 at the dollar store
Re: !*!*ADD YOUR INPUT*!*! _.- Home Made With Love -._
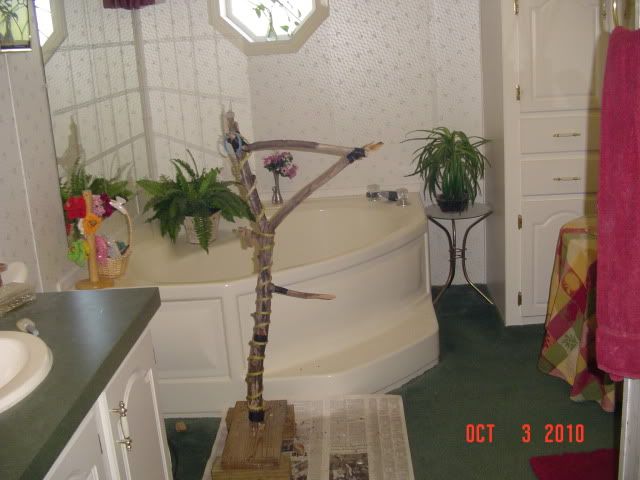
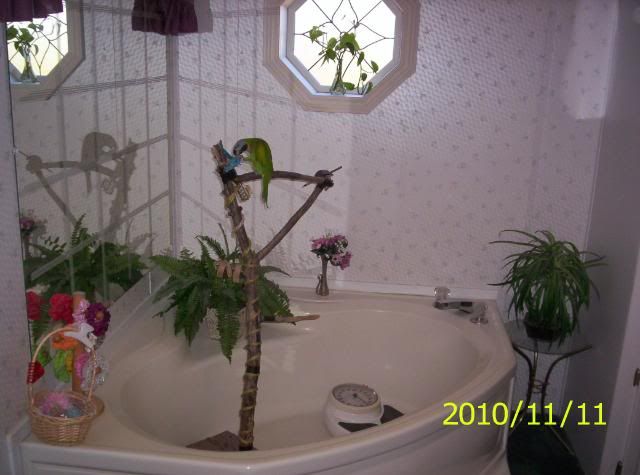
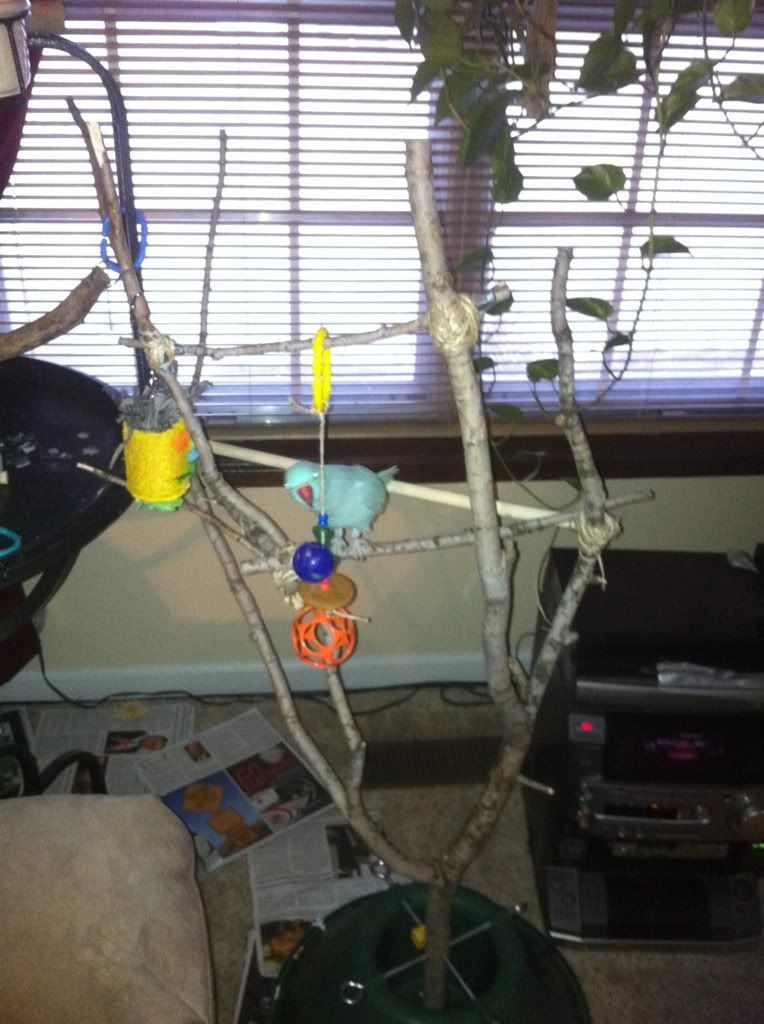
here is a simple tree stand i made using maple and oak branches from my yard.
Pandora is checking it out and herself
here is the same stand with more branches added along side a smaller on i made for Marnie using a christmas tree stand
and this last one is a pc of driftwood
Pandora is checking it out and herself
here is the same stand with more branches added along side a smaller on i made for Marnie using a christmas tree stand
and this last one is a pc of driftwood
-
- Posts: 98
- Joined: Mon Aug 23, 2010 8:25 am
- Location: Columbus, GA
- Contact:
Re: !*!*ADD YOUR INPUT*!*! _.- Home Made With Love -._
Very nice, love the Christmas tree holder idea! I might have to use that one I have a fig tree overhanging from my neighbors yard, I told them to give me any branches they prune off this year! I plan on drilling holes at each end and looping some small chain at each joint so I can (hopefully) move it around to different configurations At least that's the theory... I made a few more toys (of course, never ending right?) but I have been really busy so haven't taken pictures. One is a card chew toy and one uses a round dog toy hung by a chain with beads and blocks strung on it as a swing! Also am making him a little birdie tent out of scrap flannel, we'll have to see if he likes it though!
-
- Posts: 98
- Joined: Mon Aug 23, 2010 8:25 am
- Location: Columbus, GA
- Contact:
Re: !*!*ADD YOUR INPUT*!*! _.- Home Made With Love -._
Okie dokie, it's been a while and like usual this is not all I have but here we go.
Top right is the pant-hanger playstand now adorned with braided cotton rope running to a grape wood (reptile section of pet store, price depends on size) anchor on the cage. Hanging from the top rung is the (red) wiffleball toy I made that is still a favorite even months later (look to an earlier post for bigger picture and how it's made)! From the second to last post hangs a knotted sisal rope leading down to what was a dog chew toy ($4 at pet store) but is now an AWESOME foraging toy. Inside is crumpled up paper and mingled with that are nuts, seeds and treats. Sukha goes to town and it lasts quite a while for a foraging toy. From a previous mention is finally a picture of the wicker wreath ($1 at dollar store) with food colored hemp rope wrapped around the bottom.
Here is an orange wiffleball with crinkled paper and almonds in it as a foraging toy. Sisal rope threaded through for interest and to hold the two halves together as he drops it a lot. I broke the blue one and put large pieces of fruit and other big stuff in there for him to forage with once it's tied back together. In the background is a bendable wood bridge I got from the small animals section and a bathhouse that was originally for Chinchilla dust-baths but works beautifully to keep the water mess IN the bath! It has clips on the back if you want to secure it in the cage, but I want it out for now so I drilled holes in the bottom supports and put clips in them to hold it in place.
I'm currently making a playstand to go on top of Sukha's cage out of 1/2" PVC piping. Not sure what it will look like since I'm making it up as I go along, but I will try to post pictures afterward.
-
- Posts: 2
- Joined: Sat Nov 19, 2011 3:30 pm
Re: !*!*ADD YOUR INPUT*!*! _.- Home Made With Love -._
I make birdy stands for our birds and others as well. I'm in Australia, so use eucalypt and jacaranda mostly, with some bottle brush - all bird safe woods.
I hope that shows - I'll test it and if it does I'll show you some more, or fix it!
-
- Posts: 2
- Joined: Sat Nov 19, 2011 3:30 pm
Re: !*!*ADD YOUR INPUT*!*! _.- Home Made With Love -._
Ah, as that worked, here are some more!
"The ring" made from a hulla hoop and strands of cotton material. Their home made gym is in the background.
Home made forager from PVC pipe. The top unscrews to fill and clean.
"The ring" made from a hulla hoop and strands of cotton material. Their home made gym is in the background.
Home made forager from PVC pipe. The top unscrews to fill and clean.
-
- Posts: 98
- Joined: Wed Jun 29, 2011 7:33 pm
- Location: Oklahoma
Re: !*!*ADD YOUR INPUT*!*! _.- Home Made With Love -._
I make loads of home made toys, hobby lobby is great! You can find the little cardboard boxes with removable kids for a dollar. Drill a hole for your hemp twine, stuff the box with shredables and a treat, he loves it. I found wire tying a basket to the inside of the cage with door toys attached to the basket with twine is a big hit too!
-
- Posts: 98
- Joined: Wed Jun 29, 2011 7:33 pm
- Location: Oklahoma
-
- Posts: 98
- Joined: Wed Jun 29, 2011 7:33 pm
- Location: Oklahoma
-
- Posts: 98
- Joined: Wed Jun 29, 2011 7:33 pm
- Location: Oklahoma
-
- Posts: 98
- Joined: Wed Jun 29, 2011 7:33 pm
- Location: Oklahoma
Re: !*!*ADD YOUR INPUT*!*! _.- Home Made With Love -._
Fantastic creations and ideas! keep them coming! Id like to make this a sticky so it doesnt get lost.
"Jibby aka Gilbert" Indian Ringneck 13 years "Charlie" Rex Rabbit 1 year
-
- Posts: 98
- Joined: Wed Jun 29, 2011 7:33 pm
- Location: Oklahoma
-
- Posts: 98
- Joined: Mon Aug 23, 2010 8:25 am
- Location: Columbus, GA
- Contact:
Re: !*!*ADD YOUR INPUT*!*! _.- Home Made With Love -._
Nicely done you guys I'm so glad to see it's being made a sticky! I plan on making an outdoor-type play stand out of Fig Tree wood, that way Sukha can hang out with me in the garden during the warmer months (on a leash of course)!
Here's the start of the play stand I was talking about making. It's Sukha's own "Bird house"
Here it is a little more finished. I've done more on it, almost done covering it but Christmas season has kind of slowed all of my projects down.
Planning on making a foraging area (aka "kitchen") in the middle of the bottom floor and am recovering the resting perches (aka "beds") to make them cushier and so forth. He looooves his bathroom (Chinchilla dust bath house if you want to get one for yourselves!)
Re: !*!*ADD YOUR INPUT*!*! _.- Home Made With Love -._
WOW! These toys are amazing! I have a couple of ring necks and at the moment only really buy store toys, however I'm hopefully getting another couple of ring necks soon and this thread has inspired me to try making some of my own toys! Keep posting!
Re: !*!*ADD YOUR INPUT*!*! _.- Home Made With Love -._
Woow great toys and using home materials, it makes them cheap and easy to get, thanks for the share
-
- Posts: 386
- Joined: Mon Sep 17, 2012 2:52 am
- Location: Bunbury, Western Australia
Re: !*!*ADD YOUR INPUT*!*! _.- Home Made With Love -._
Hi All,
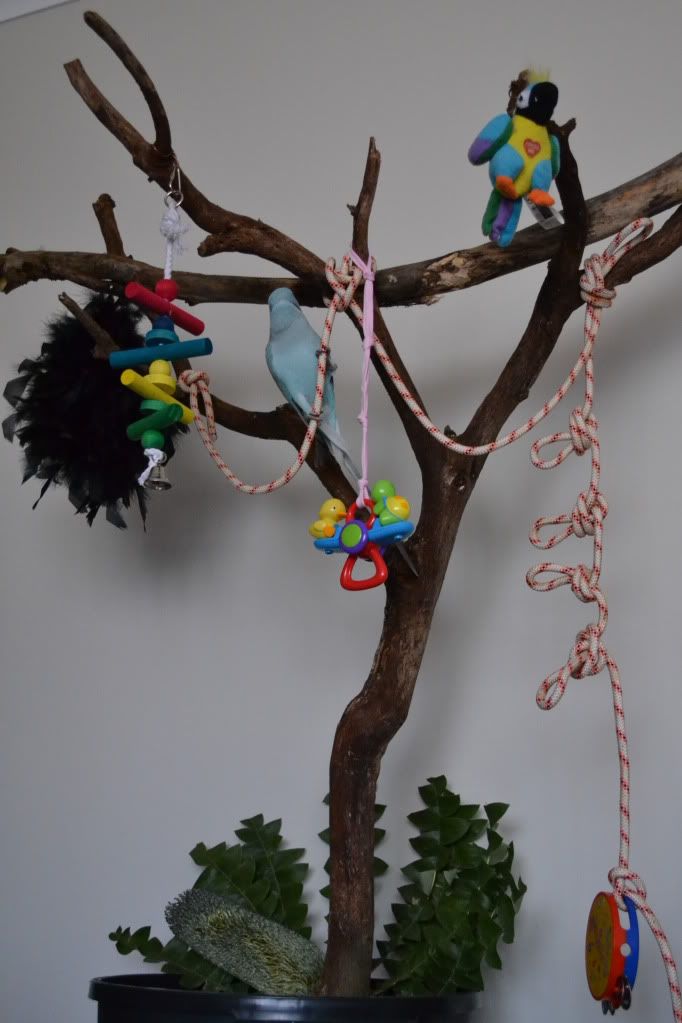
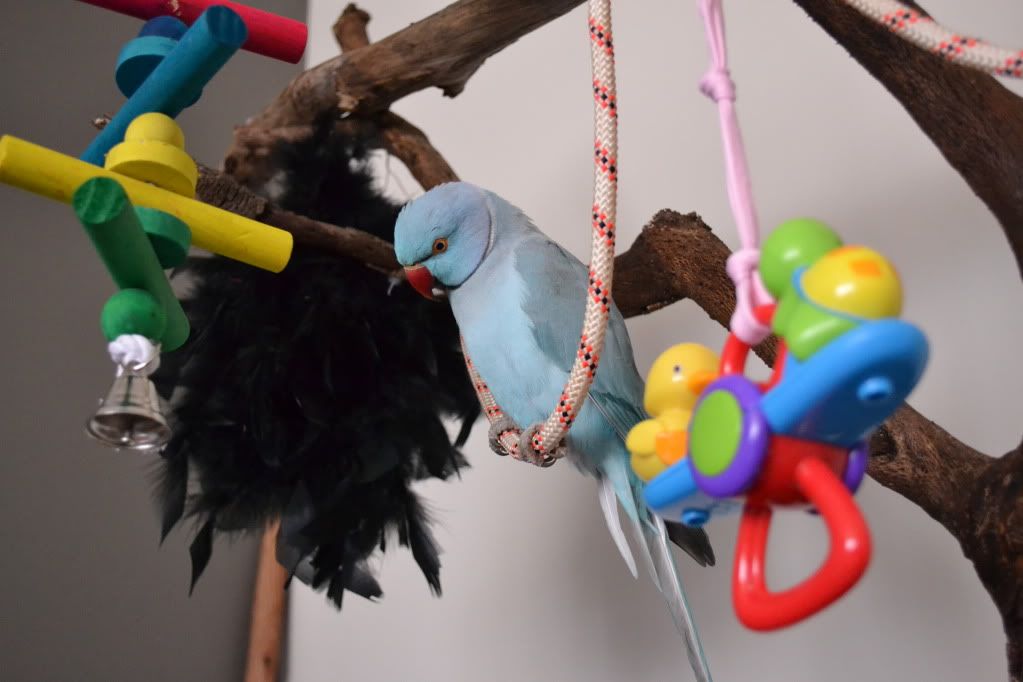
Here's a couple of pics of the "Play Gym" tree we put together for our IRN Skittles.......we are still adding to, but so far, it's been a huge success! He loves it
The theme music to "Mission Impossible" often comes to mind as we watch him climbing the rope and scooting across the branch between his toys!
Regards Deb
-
- Posts: 2708
- Joined: Mon Jul 19, 2010 1:17 am
- Location: Sunshine Coast, Queensland, Australia
Re: !*!*ADD YOUR INPUT*!*! _.- Home Made With Love -._
That's fantastic. Well done! It also looks achievable by someone as handy-challenged as I am! Although maybe it's harder than it looks.
Ellie.
Ellie.
-
- Posts: 386
- Joined: Mon Sep 17, 2012 2:52 am
- Location: Bunbury, Western Australia
Re: !*!*ADD YOUR INPUT*!*! _.- Home Made With Love -._
Thanks Ellie!
No, not hard at all! Very simple and easy, (I'm somewhat creatively challenged myself )
Regards Deb
Re: !*!*ADD YOUR INPUT*!*! _.- Home Made With Love -._
I'm also not much of a handyperson, but I managed to create a playstand that works pretty well. I used a tripod shape, with a long bird ladder and two branches leaning together, tied in the middle like the frame for a teepee.
I used a tray from an old cage as the base, to catch mess and give the branches something to lean against. I then added a straight horizontal perch for tricks and training, a few hanging toys and loose toys and branches on the base for exploring.
I'm pleased with the tripod shape because it makes cleaning really easy. All the mess falls onto the base (ok, MOST of the mess), so I just put a sheet of newspaper in the base, which is really easy to change.
It's not likely to win any home decorating prizes but hey, my birds seem to like it. I've tried attaching a photo - hopefully you can access it.
-
- Posts: 131
- Joined: Thu Feb 21, 2013 8:52 am
Re: !*!*ADD YOUR INPUT*!*! _.- Home Made With Love -._
I made my Apollo a baby blanket I'm hoping it will be a source of comfort for him in his tub.
I'd love to post a picture but when I use an outside link it tells me I look too "spammy" and when I attach the file it says the board attachment quota has been reached.
Completely, Utterly & Unconditionally In Love With My Baby Ringneck, Apollo!
-
- Posts: 16
- Joined: Mon Apr 09, 2012 7:23 am
- Location: Sarasota, Florida
Re: !*!*ADD YOUR INPUT*!*! _.- Home Made With Love -._
Neat toys ALL. I'm handy but lacked artistic insight....I'm now inspired...THANKS
-
- Posts: 13
- Joined: Fri May 24, 2013 3:26 pm
- Location: Redlynch, QLD, Australia
Re: !*!*ADD YOUR INPUT*!*! _.- Home Made With Love -._
Any general rules for do's and dont's when making bird toys in the way of materials etc?
Jess
Jess
Jess and Damo
xoxo Our animals are our life xoxo
Re: !*!*ADD YOUR INPUT*!*! _.- Home Made With Love -._
Just keep an eye on safety. For metals, stick to stainless steel. Both copper and zinc (a popular coating material) are toxic, and remember lead poisoning! Galvanized steel is coated with zinc, as well as many bits of hardware (nuts, bolts, hooks, washers, etc). So called "pot metal", base metals used in cheaper stuff, are suspect as well. Look for that in cheap bells and trinkets.
For rope or cord, aim for something with a known fiber content that has not been treated. Any rope that won't fade in the sun or withstands water, etc, has likely been treated with something you don't want birdie nibbling. I skip plastic or nylon rope because I feel it is just too easy to get those fibers apart, and I don't want my bird eating anything that is first cousin to dental floss. I like plain jute or hemp, though I would be just as happy with plain cotton if I could find it.
I am a purist and I don't like my bird to have anything dyed. Some people are comfortable with vegetable dyes, and some people don't seem to care. I do give him a minimum of artificially dyed stuff, but if he chews it much, out it goes. For home use on wood or paper, beets make a *lovely* vibrant colour, and berries are good too. Dark green leaves can yield a green dye - think of grass stains on the knees of your pants. There is caution on the cardboard rolls from paper goods. Some are scented ( a no-no) and some say the glue is harmful. I use pieces of plain brown cardboard box. If you cut rings from these, be mindful the bird can get them stuck on his neck.
About plastics, I don't like them, but I am one of probably only three people on the planet who feel this way. My bird does get plastic toys, but he is not a plastic chewer. If he chewed plastic and I thought he would eat the bits, I would not let him have that. It is true that all the plastics he gets are hard plastics, so they resist little chunks coming off. He has a great number of beads I cut off human baby teething rings (such as this one: http://www.walmart.com/ip/Bright-Stars- ... e/21671764 ) which he loves for foot toys. Shower curtain rings from the Dollar Store are also a win.
DO keep a wary eye on potential tangling, choking, entrapment, and cutting hazards. If a bird gets tangled in something, it may panic and do itself harm beyond what a simple entanglement might cause without the extra commotion.
That said, I find it is really nice to make stuff for the bird. It's relaxing, creative, and frugal, and it lets you give your bird *exactly* what you think he will like. The sight of your own bird enjoying something you made him with your own hands, with love, is very rewarding to say the least.
Enjoy.
-MissK
-MissK
-
- Posts: 13
- Joined: Fri May 24, 2013 3:26 pm
- Location: Redlynch, QLD, Australia
Re: !*!*ADD YOUR INPUT*!*! _.- Home Made With Love -._
Thanks MissK,
What about types of timbers...are there specific trees we should avoid?
Jess
What about types of timbers...are there specific trees we should avoid?
Jess
Jess and Damo
xoxo Our animals are our life xoxo
-
- Posts: 1946
- Joined: Thu Feb 28, 2013 12:49 pm
- Location: Hawaii
Re: !*!*ADD YOUR INPUT*!*! _.- Home Made With Love -._
Hey Jess. You can refer to this list to see what's safe
http://www.plannedparrothood.com/plants.html
I am owned by my birds...and I wouldn't have it any other way
Re: !*!*ADD YOUR INPUT*!*! _.- Home Made With Love -._
I use a lot of fig branches. Several lists have them as safe, and fig grows quickly enough after the 3rd year to cut as much as you will want for a bird. We're talking about the fig shrub/tree that grows figs for you to eat. Parrots like to eat them, too! Of course, avoid anything that has been exposed to any kind of spray.
I believe butterfly bush ( buddleia, another fast grower) is good as well.
I would say, check your yard for what seems big enough to cut and then Google to research safety. Please note it is said that certain fruit trees produce nsafe wood at certain times of the year. In addition, do a cross check to be sure the thing you are looking at is the one mentioned - for example, Maple versus Red Maple. You may find one type toxic and another type safe.
-MissK
-MissK
-
- Posts: 1946
- Joined: Thu Feb 28, 2013 12:49 pm
- Location: Hawaii
Re: !*!*ADD YOUR INPUT*!*! _.- Home Made With Love -._
Ok...I got the tree bug from everyone. I made hubby go cut down a branch off of our Banyan Tree (Fig) here is the result
It's still a work in progress. I ordered a bunch of toy making supplies I'm waiting for in the mail. Kind of resembles Charlie browns Christmas tree lol
I am owned by my birds...and I wouldn't have it any other way
-
- Posts: 1946
- Joined: Thu Feb 28, 2013 12:49 pm
- Location: Hawaii
Re: !*!*ADD YOUR INPUT*!*! _.- Home Made With Love -._
I am owned by my birds...and I wouldn't have it any other way
Re: !*!*ADD YOUR INPUT*!*! _.- Home Made With Love -._
I love it! Bug and Rufus have a tree now too which looks kind of similar. I like hiding nuts in the toys hanging in the branches and watching them forage...I think they think the tree 'grows' treats
There's something special about seeing them exploring a 'tree', isn't there? I guess because it just looks so natural to them.
Re: !*!*ADD YOUR INPUT*!*! _.- Home Made With Love -._
Skye -
Nice Crew!! And nice tree, of course.
Somebody back a ways had a tree in a tree stand from Christmas. I think that was a crackerjack idea. It really beats the bucket of sand. There are some freestanding flagpole stands out there as well, for a smaller diameter "tree". We don't have one 'cuz space is kinda tight.
-MissK
-MissK
-
- Posts: 1946
- Joined: Thu Feb 28, 2013 12:49 pm
- Location: Hawaii
Re: !*!*ADD YOUR INPUT*!*! _.- Home Made With Love -._
The tree stand was a great idea!!! I just put a length of 4" PVC and tightened it down with the screws and slipped the tree base into that. Weighted it down with river rock. That sucker isn't going anywhere. sand in my house was NOT an option
Jen...I love seeing them in the tree. When we were putting it up Skye was pacing back and forth. As soon as I opened his cage he flew to it and claimed his spot. It's so much better than that clinical play gym we had. Not that there's anything wrong with them...but they really don't do much for 5 birds trying to enjoy some playtime. Now there's no arguments for space.
Only thing I'm still trying to figure out is how to add a cup for treats and water.
I am owned by my birds...and I wouldn't have it any other way
Re: !*!*ADD YOUR INPUT*!*! _.- Home Made With Love -._
Rocky's got a food cup in its very own cosy little jute cord hanger net. Homemade. It hangs from the ceiling for use with his doorway perch. As long as he doesn't decide to chew the hanger it's working for us.
In the travel cage I simplified the idea with a plastic bowl (Gladware or Ziplock or somesuch). I used a regular holepunch (like for school) to put a few holes close (but not too close) to the rim, regularly spaced. I tied on some strings and used them to hang it. Only drawback to that is that I can't just lift out the bowl for cleaning.
I've been considering to drill through one of the thicker perches in his regular cage so I can mount the coop cups farther to the interior, at least for seeds, to try and keep the mess a little less on the floor. Have not done this yet. Lazy.
-MissK
-MissK
-
- Posts: 1946
- Joined: Thu Feb 28, 2013 12:49 pm
- Location: Hawaii
Re: !*!*ADD YOUR INPUT*!*! _.- Home Made With Love -._
Me and drills don't get along lol. I was looking at mounted cups. I use the pro steel ones normally, but i don't know if it would work for a tree branch. I'm going to give it a shot with one I already have and then if it works ill order more.
I am doing one other project of a floating perch. I have a length of guava tree branch and I'm going to add eye bolts to each end and suspend it from a chain in the ceiling. I may have to use a drill. Ill let you know how that turns out
Also I forgot to tell you of one I did the other day. I took a 3 tiered vegetable basket that I had stuffed in the back of my pantry and hung it from the ceiling. Hung toys and beads and wood from it and filled the baskets with all kinds of balls. Skye sits up there and tosses the balls down to me.
I'm thinking its starting to look like Disney bird land in my house
I am owned by my birds...and I wouldn't have it any other way
Re: !*!*ADD YOUR INPUT*!*! _.- Home Made With Love -._
Hee hee hee! I bet it does!
When you drill, make sure you have clamped your material securely because, as that bit enters, the material is going to want to spin. The drill is very strong and unless your material is very heavy, or well clamped, you'll get an unexpected surprise. Holding it by hand may not be enough, and you don't want your hand in danger anyway.
While on the subject, make sure your branch diameter is big enough to support the size hole you're going to make. This means that you must ensure once the hole is drilled, the remaining wood (between the hole and the exterior) is thick enough to withstand the pressures that will be exerted upon it. The first pressure will be the drill bit, then you screwing in whatever bolt you've chosen, which will likely enlarge the hole ever so slightly. After that will be the forces applied by weight and movement of whatever is on the other end of the bolt.
If there is reason to suspect the material is in danger of cracking during drilling, perhaps because it is brittle, or very thick or thin, or you are drilling on a natural line of cleavage, or making a particularly large hole, you WILL want to start with a smaller bit and enlarge the hole in increments. (Actually, if you are drilling on a natural line of cleavage, you should consider drilling someplace else!)
When I drilled my plexiglass, for example, I used a succession of at least ten bits, starting with the most itsy bitsy teensy weensy one. I was making a large hole ( not quite pencil size) in a brittle material very close to the edge. In fact, I failed to plan for hole size when I marked my original holes, cracked the stuff because of drilling too close to the edge, and had to flip it over and try again. It might have been overkill to use quite as many bits as I did, BUT I only had the one piece of plexiglass cut to size for this project.
I urge you to become friends with the power drill. It is my very favourite tool and very handy. Ear protection is never a bad idea with drills, and don't forget your safety goggles!
-MissK
-MissK
Re: !*!*ADD YOUR INPUT*!*! _.- Home Made With Love -._
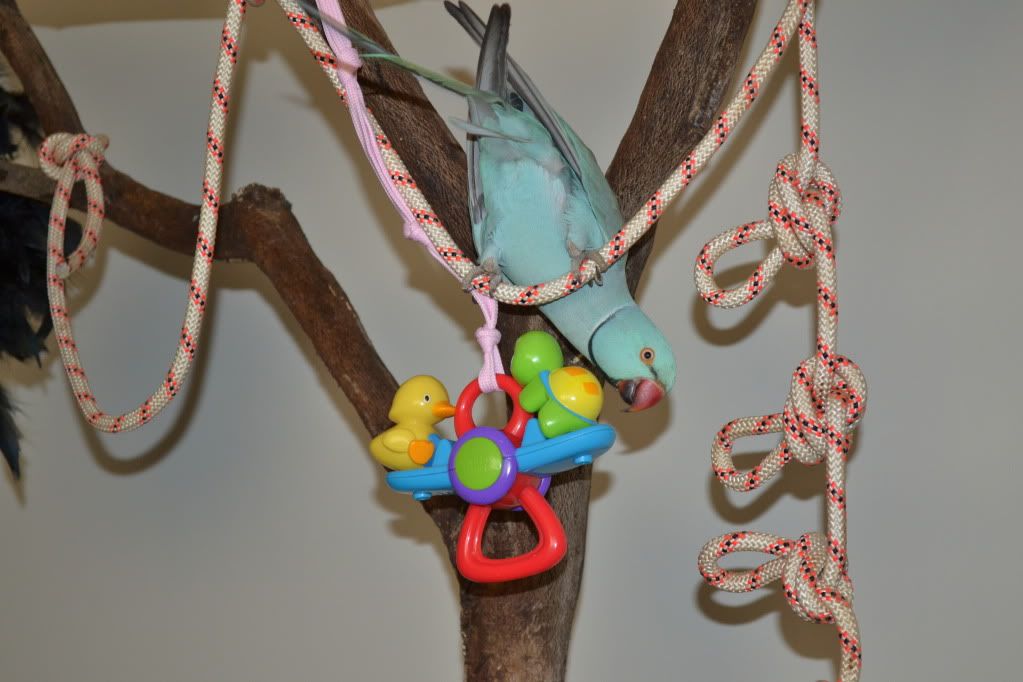
I make all my toys at home. I buy things from different place to make Gizmo's toys. He loves to destroy anything so it saves me lots of money here is part of his play area! I will be adding on to soon. Still deciding whether I Should get a Quaker parrot or another ringneck or just have him.
-
- Posts: 1946
- Joined: Thu Feb 28, 2013 12:49 pm
- Location: Hawaii
Re: !*!*ADD YOUR INPUT*!*! _.- Home Made With Love -._
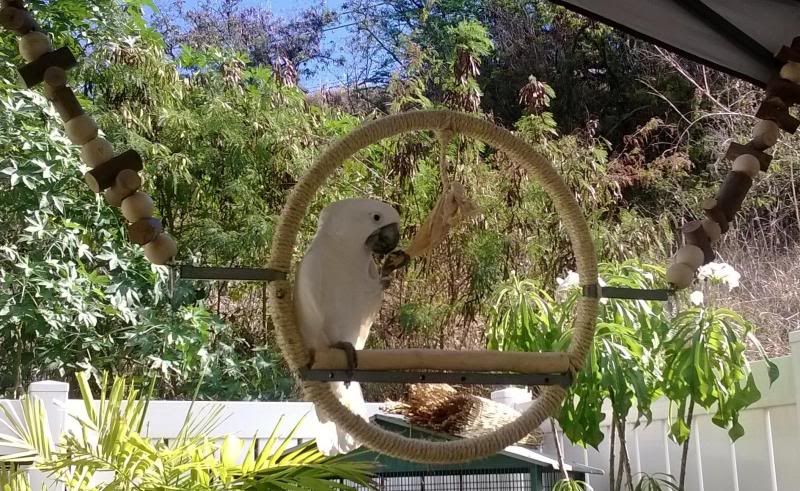
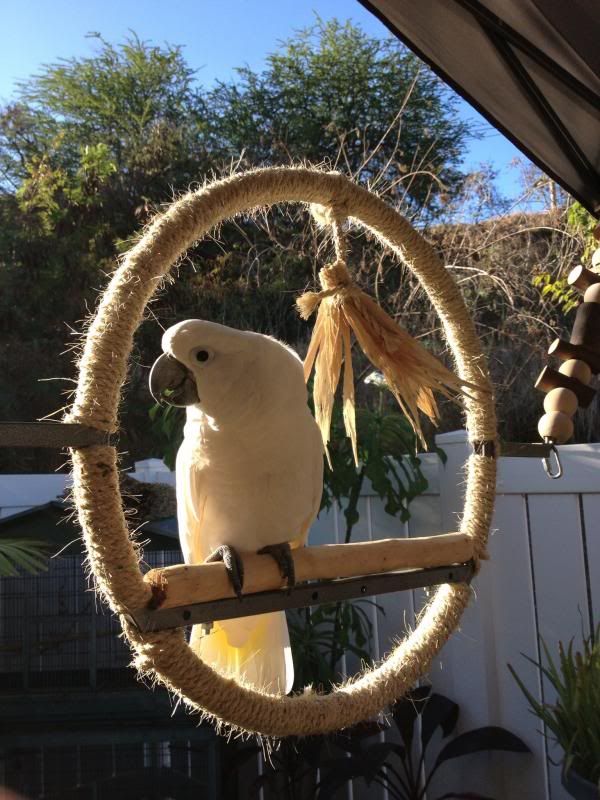
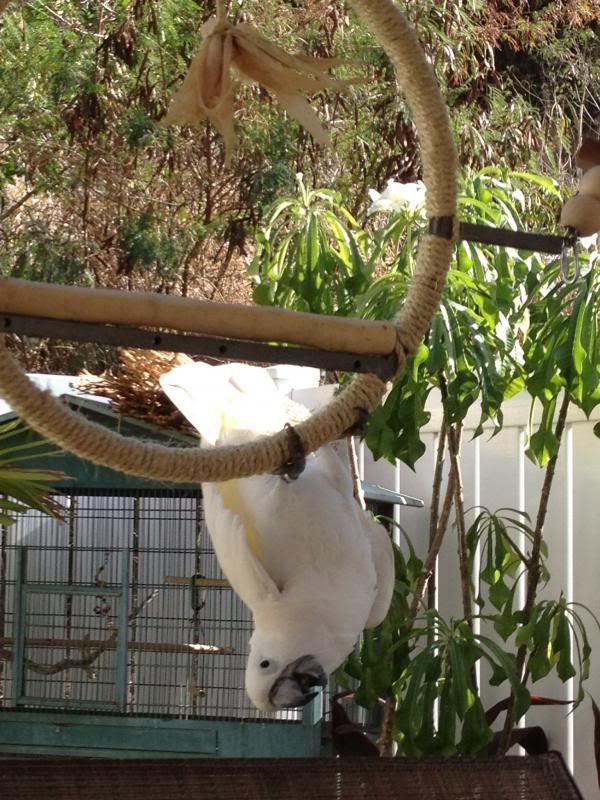
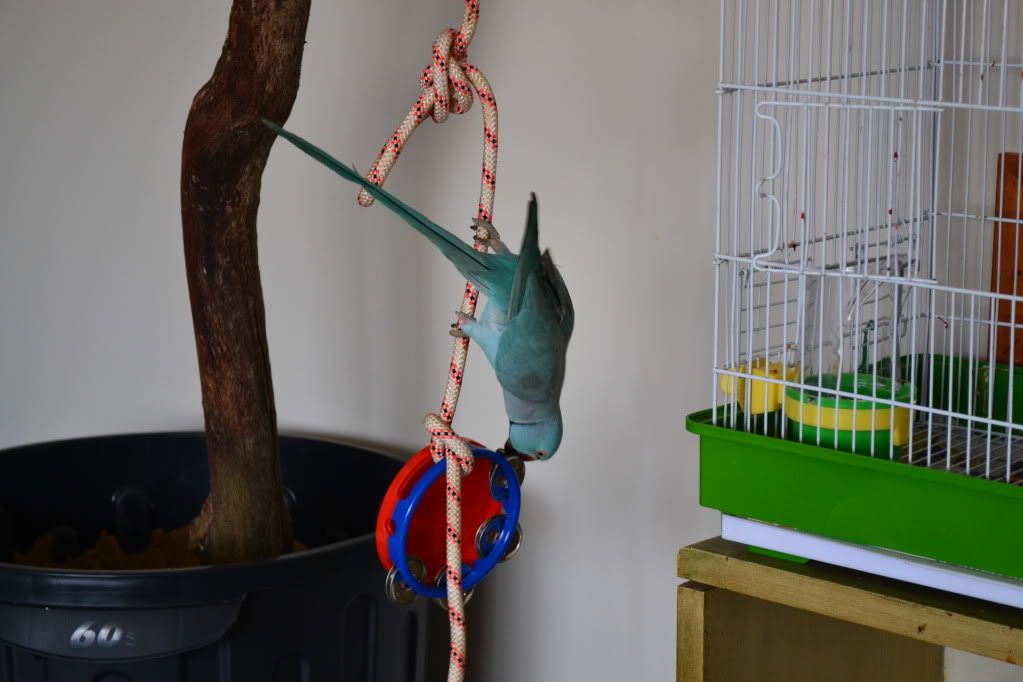
My new swing/play gym. I originally made it for indoors, but the weight was too much for my ceiling or doorway. So now it belongs exclusively to my cockatoo in his outdoor space. It is still adaptable to add toys, so I'm still working on that, but he loves it.
I am owned by my birds...and I wouldn't have it any other way